Printing
How to print a large sewing pattern on A4
A large pattern needs to be tiled, not shrunk. This guide takes you from a supported source file to an A4 PDF you can test, print, trim, and assemble.
Before you start
- A supported PLT / HPGL, DXF, or compatible PDF pattern
- A4 paper selected in both Laytura and the printer
- A ruler for the scale check
- A PDF viewer with an Actual size or 100% print option
Step-by-step
- 01
Open the pattern
Open the source file and wait for the geometry and detected pieces to appear. Review any import warning before continuing.
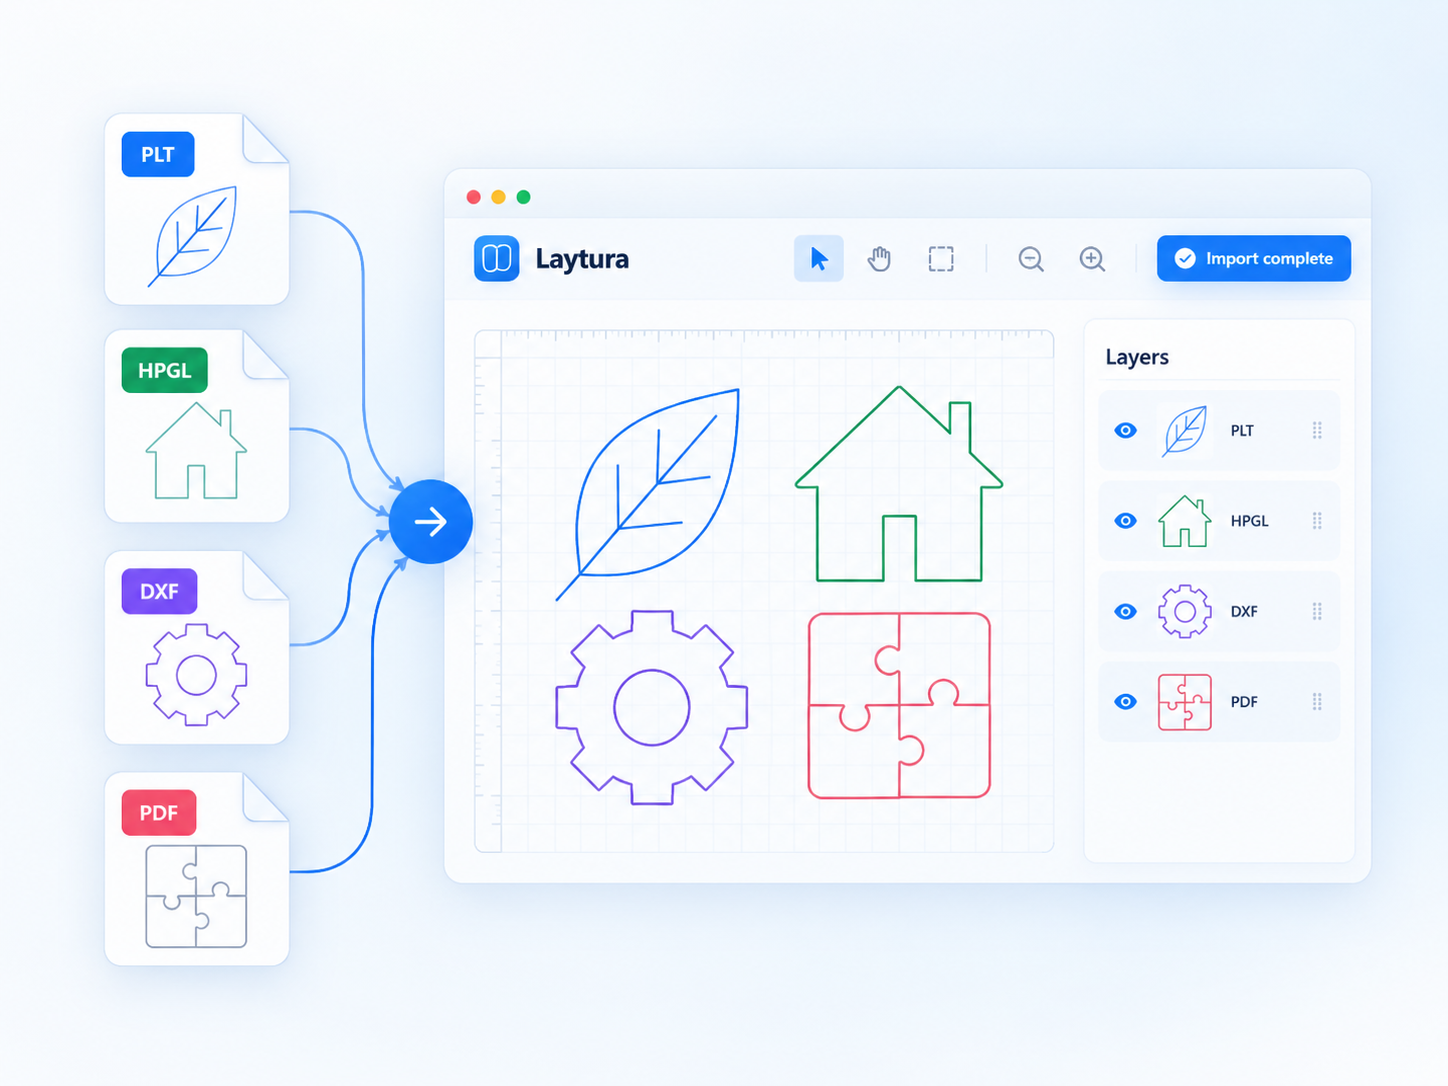
Static preview—ready for a future product clip - 02
Check the physical size
Confirm the displayed dimensions match the pattern instructions. Keep scale at 100% unless the designer specifies another value.
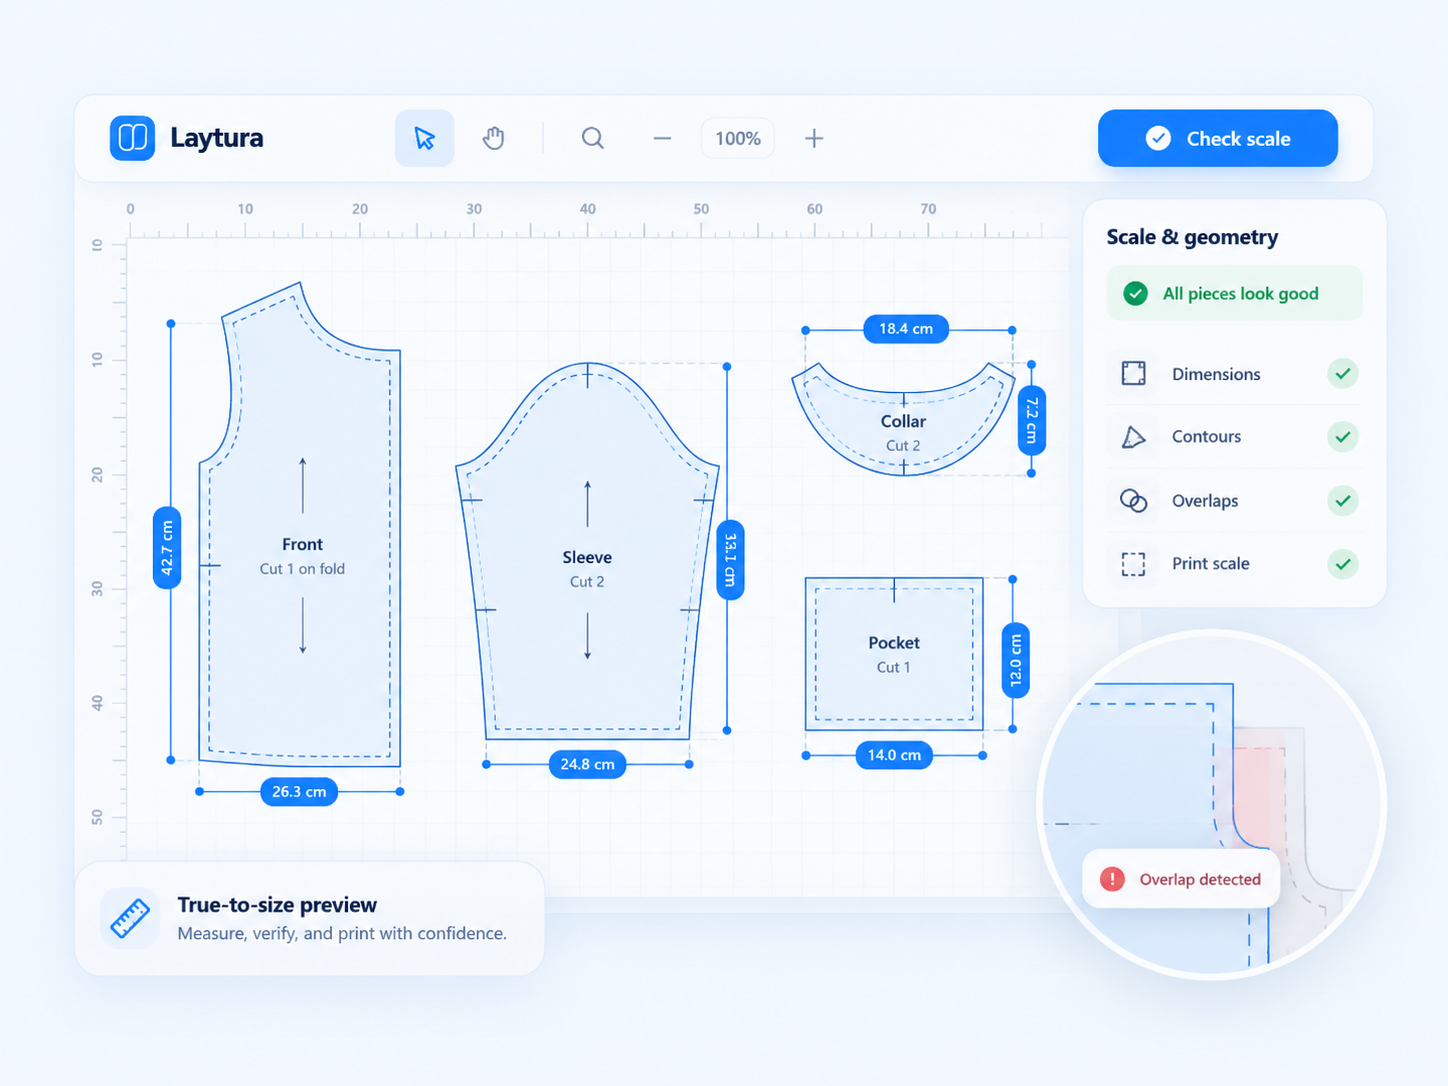
Static preview—ready for a future product clip - 03
Prepare A4 pages
Choose A4, orientation, overlap, page labels, and assembly guides. Arrange or optimize pieces, then inspect every occupied page.
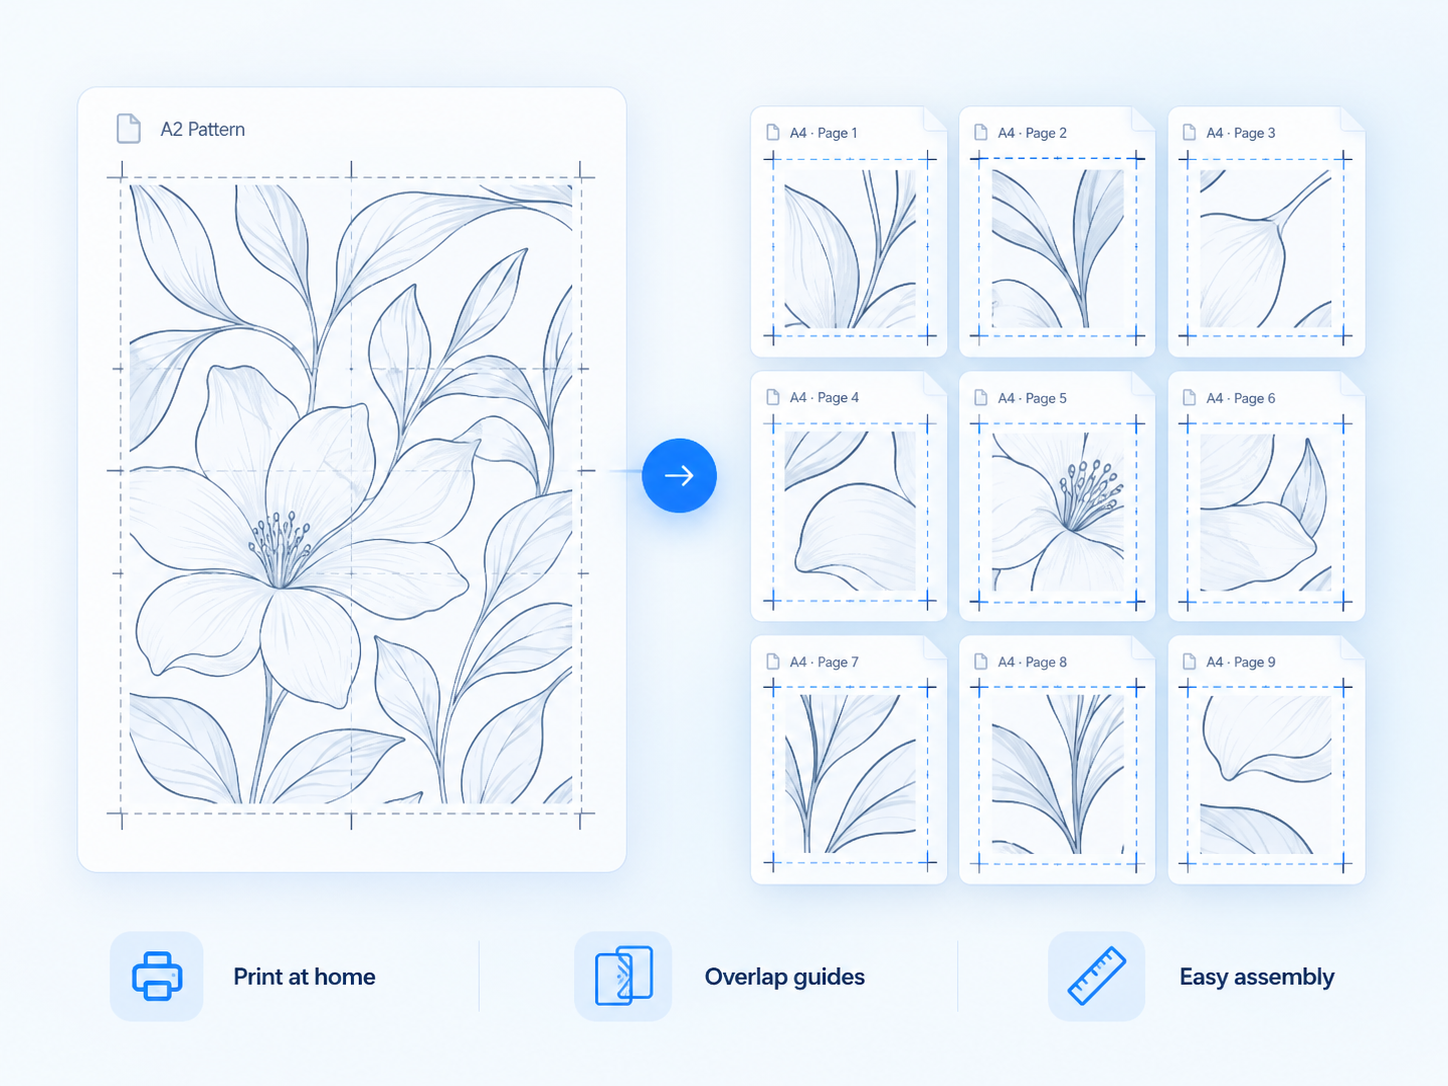
Static preview—ready for a future product clip - 04
Export and test one page
Export the tiled PDF. In the PDF viewer choose Actual size or 100%, print the scale-check page first, and measure it before printing the rest.
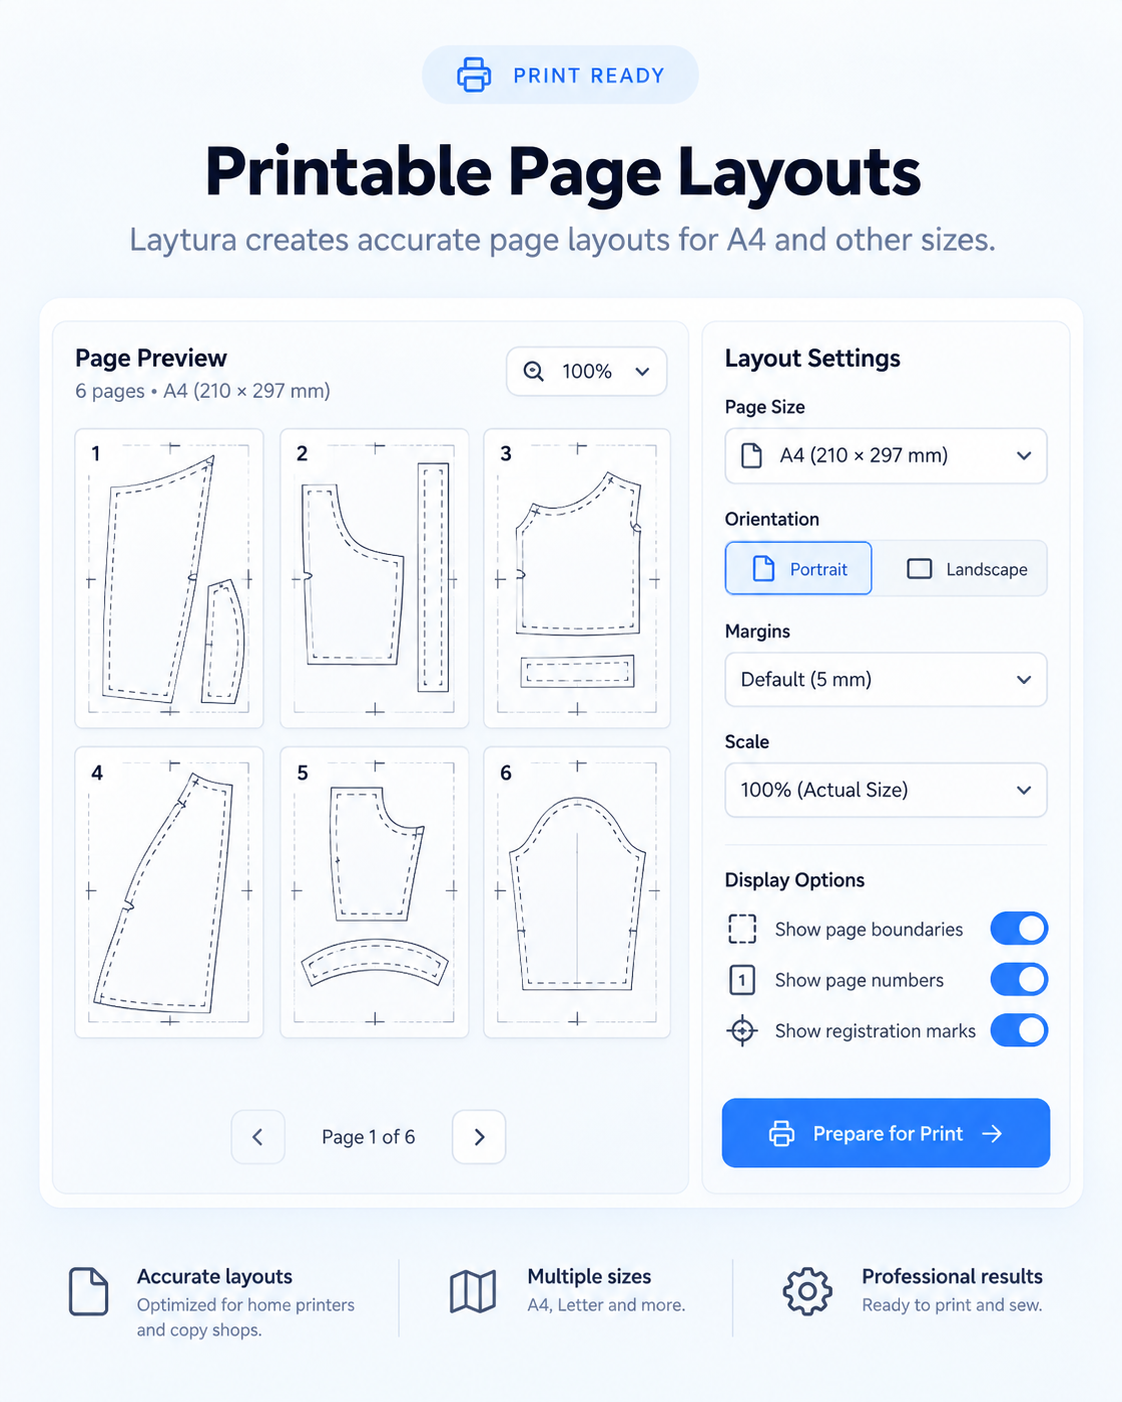
Static preview—ready for a future product clip
Common mistakes
- Changing page size and pattern scale at the same time
- Skipping pages without checking whether they contain alignment marks
- Printing the entire file before measuring the calibration page
Expected result
A tiled A4 PDF whose page labels, overlap, and measured scale match the preview.